Tips from the Field: Creating Office 365 Groups
In a previous post, we discussed the advantages of Office 365 Groups, which bring all Office 365 productivity apps together so you have an integrated solution to manage your projects.
Office 365 Groups represent a new way to enable team members to collaborate in a common workspace with a standard set of tools. You can create an Office 365 Group from Outlook, Yammer, Teams, SharePoint Online, and Planner. What’s unique is that when an Office 365 Group is created, you are automatically provisioned a shared Outlook mailbox and calendar, One Note Notebook, Planner instance, and SharePoint site collection.
A Team’s Team and Yammer Groups can also be associated with the Office 365 Group. Also, you don’t have to worry about permissions since everyone added to the group automatically gets permissions to the appropriate applications. It’s a quick way to set up a collaboration space with all your favorite tools integrated and accessible in one place.
Creating an Office 365 Group
So how do you create an Office 365 Group? It’s pretty simple and depends on which Office 365 application you start from. Here are the steps:
- Create New Group. The method is similar in each application.
Outlook:
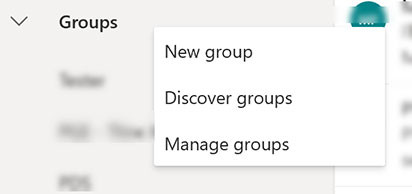
Navigate to Groups in the left navigation and click “New group,”
Yammer:
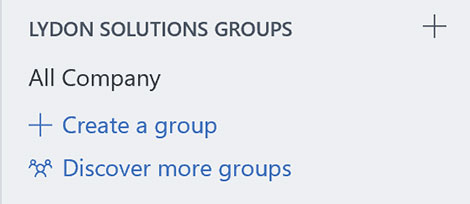
Navigate to Groups in the left navigation and click “Create a group.”
SharePoint, Teams, and Planner:
When you create a modern site collection in SharePoint, a new Team in Teams, or a new Plan in Planner, an Office 365 Group with the same name will be automatically created.
2. When you create a new Group, you get a window like this. (The exact display may vary depending on your application.)
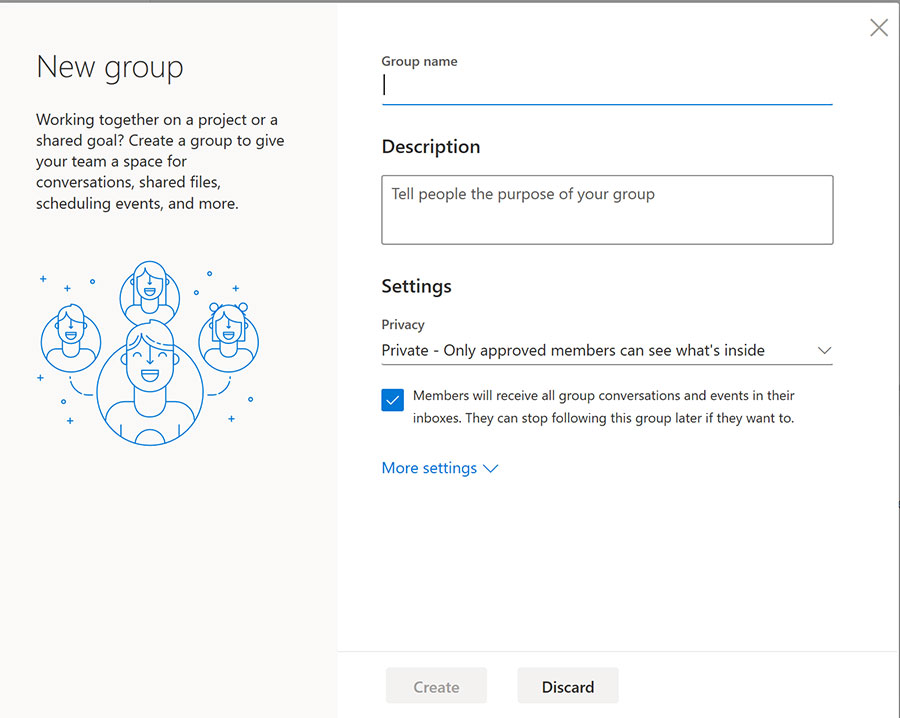
- Provide a Group name that is related to the project.
- Describe the Group’s purpose.
- Select whether the group will be Private or Public. My recommendation is to default to Private since you will probably want to restrict access to the Group. Also, leave the box checked for “Members will receive all group conversations and events in their inboxes." They can stop following this group later if they want to.
- Under “More settings” are the language preferences.
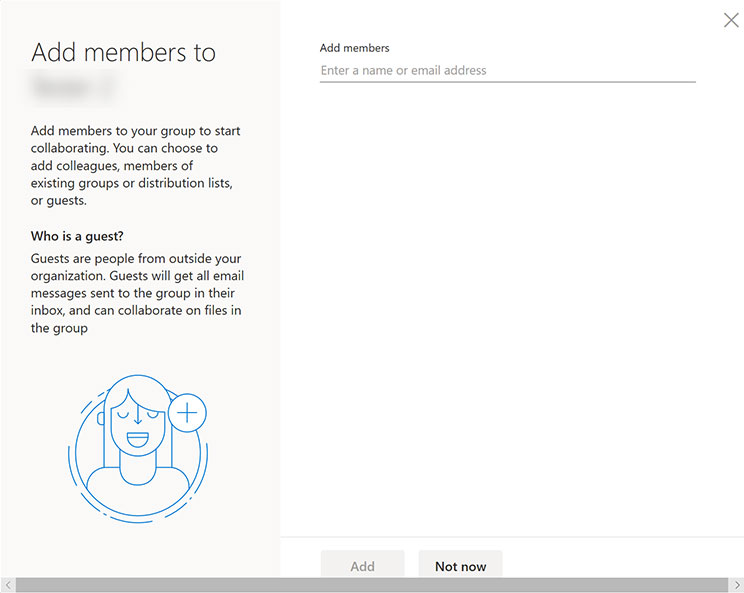
3. Add members to your Group. This step allows you to add users who will have access to the applications associated with the Group.
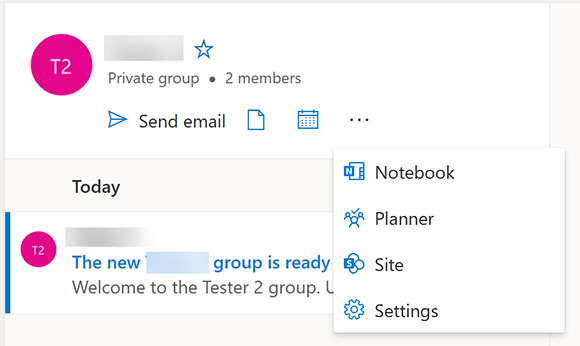
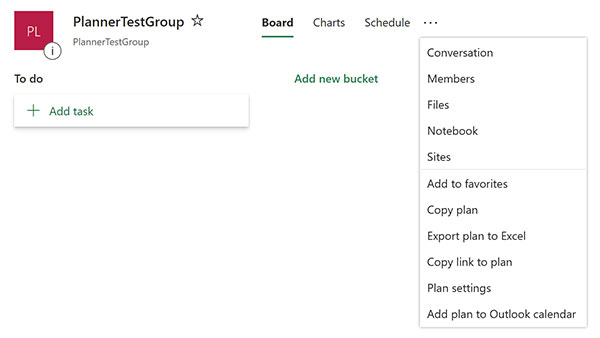
4. The Group is created with the associated applications. The new Office Group menus within each application are very similar. (At some point, I expect Microsoft will make them identical.) You can navigate into Planner, SharePoint, One Note, Yammer, and even Teams from within the Office 365 Group. For comparison purposes, see Outlook and Planner below:
Outlook:
Planner:
That’s it. Pretty simple overall. I suggest reading my blog post on Office 365 Groups where I provide some considerations for creating Office 365 Groups.
Microsoft continues to bring the Office 365 suite of productivity tools together into a cohesive productivity solution. The Office 365 Groups seem to be the first step, and Microsoft’s Fluid Framework will take this even further. Make sure to subscribe to our blog as we’ll update you on developments as they are rolled out.

Related Posts
Struggling to Share SharePoint Files Externally? Here’s the Fix
How the New Copilot Project Manager AI Agent Benefits Construction Scheduling
Construction Document Management and the SharePoint Term Store