Keeping it Simple: Cost Report Using Microsoft 365 Lists
Many construction organizations have transitioned to Microsoft 365 but might not leverage all the applications included in their subscription. Microsoft Lists is an often overlooked application that can provide unique features for tracking project deliverables such as issues, asset management, action items, and even a simple cost report. Read on to learn how to build a simple cost report using Microsoft 365 Lists.
What is Microsoft 365 Lists?
Lists is a Microsoft 365 application that allows you to create a configurable data grid, with multiple views, that can be shareable with your team members. Lists is a modern application that stores its data behind the scenes in good old-fashioned SharePoint lists. Within Lists, you can view all the lists from all the SharePoint sites you can access. The benefit of having the separate Lists application is that users don’t have to go to every SharePoint site to create or find the needed list.
Let’s create a cost report!
Let’s create a simple cost report list to demonstrate how easy Lists is to use.
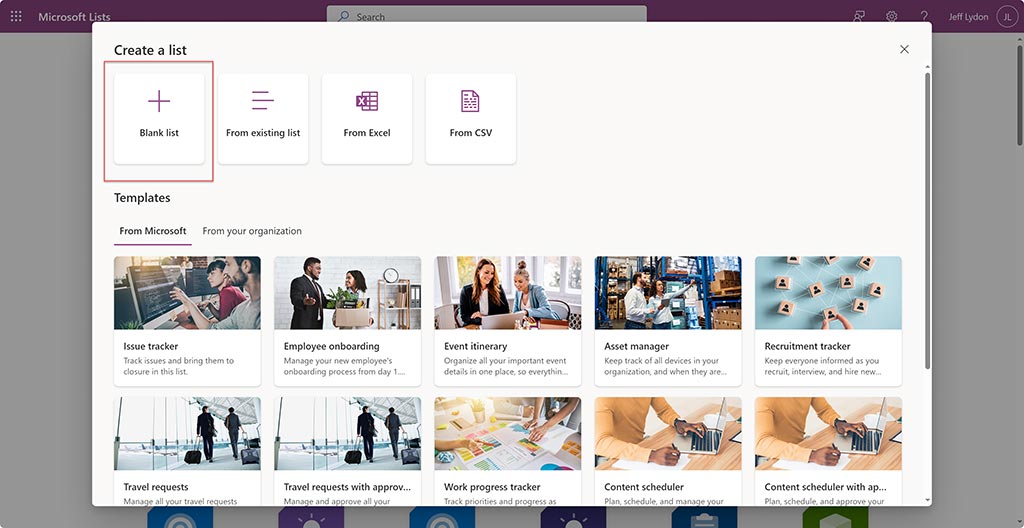
Navigate to the Lists app in Office.com, click New List, and select a Blank List.
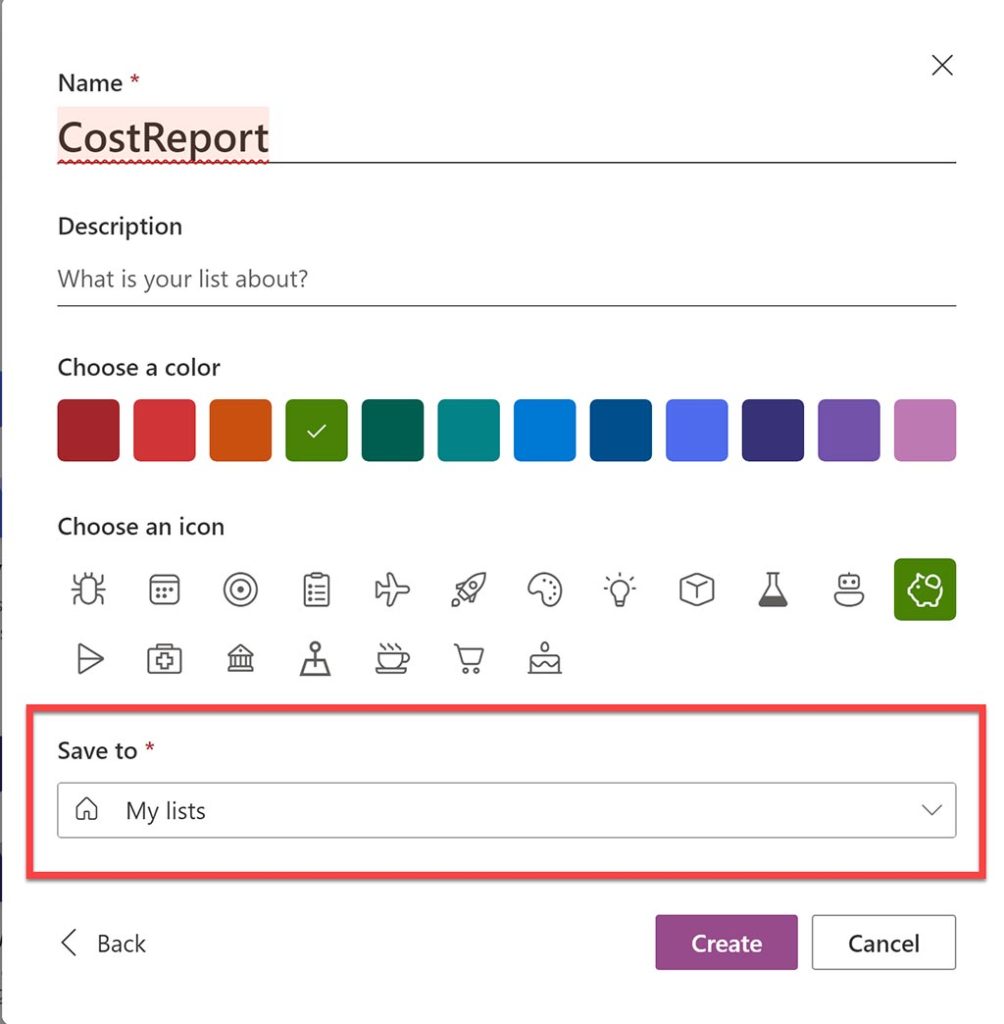
You can name your list “CostReport” and add some basic theming.
Select where to save the list. You can save your list to an existing SharePoint site or My Lists, which is saved to a SharePoint site that is automatically created for you, and you can get to My List directly through OneDrive. For this exercise, select My Lists to save your data. Note: If you intend to extend the functionality of this simple cost report, I recommend choosing a SharePoint site to save your data instead of My Lists.
Once you create the list, you can begin creating columns. Note: The title field is automatically created. Consider using cost code/WBS name as the title.
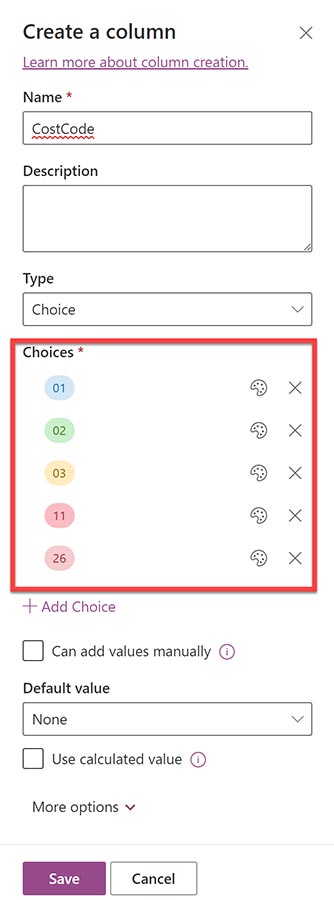
For your cost report’s actual cost code field, you could create a column and name it CostCode. Select “choice” as the field type and add each corresponding WBS/cost code identifier choice.
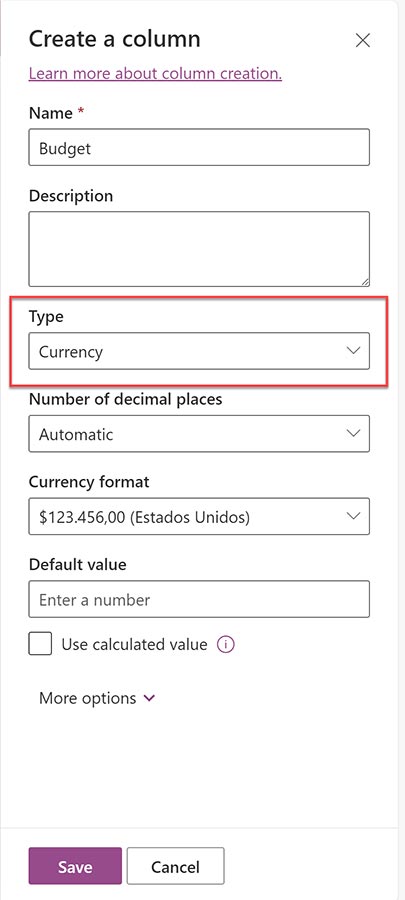
For each financial column of your cost report, create currency columns:
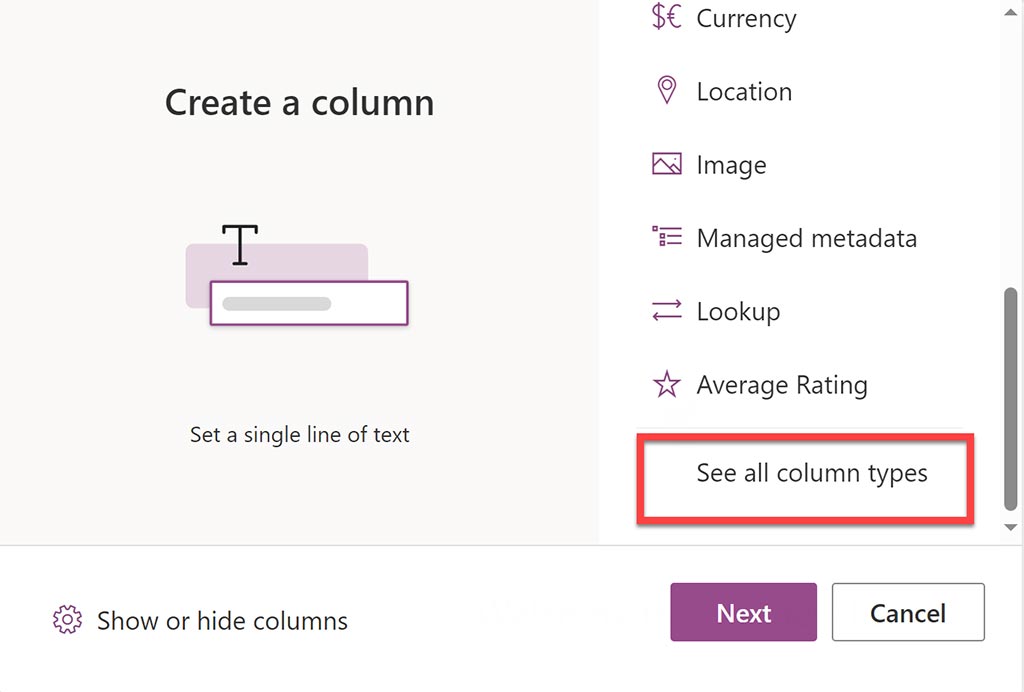
To calculate fields such as budget or forecast variance, create calculated columns. Calculated columns are not readily apparent from within the Lists “create a column” menu. You have to select “see all column types” and click next, which then navigates you to a SharePoint list settings create column menu
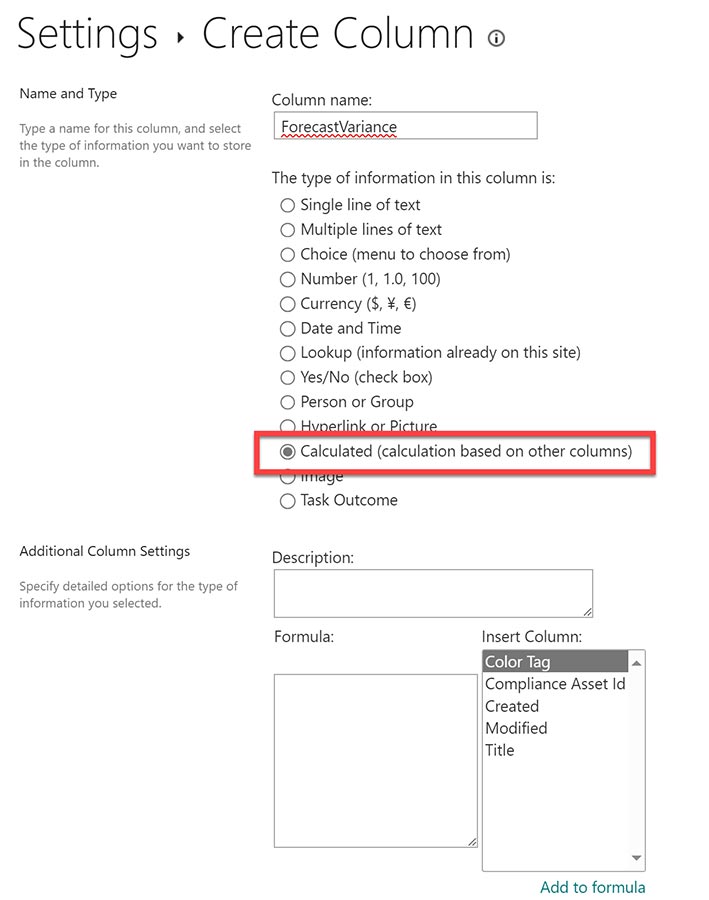
From the SharePoint list settings “create column” menu, select calculated for the “type of information in this column” and select currency as the “data type returned from this formula.”
Formulas allow you to select columns that you have previously created in your list and add them to a calculated column. Here is a list of common formulas you can use for a calculated column.
You are going to want to create your variance columns using calculated fields.
Once you create all the columns you need to track your project costs, click New to add records for each row of your cost report.
From the SharePoint list settings “create column” menu, select calculated for the “type of information in this column” and select currency as the “data type returned from this formula.”
While every cost report for every project can be different, we created a simple cost report so you understand how it can be built and customized.
Going outside the box
If you are looking for something a bit more complex than a simple cost report using Lists, you could extend the functionality further by incorporating other Microsoft 365 applications into your solution. For example:
- Integration from your financial systems for commitments and spends using Power Apps and Power Automate workflows.
- Standardized WBS/cost codes across cost reports using SharePoint site columns for consistent reporting.
- Build Power BI reports for slicing and dicing the cost report data.
- Automatically save cost reports by period and compare variances between periods using Power Automate to copy the list and update the PreviousForecast column.
We hope this simple cost report exercise provides an easy way to spin up a straightforward tracking tool for your project. If you need help customizing Lists to your specific project needs or need help with Microsoft 365, you can contact us for a free consultation.
If you need a more robust solution for Microsoft 365, you can request a demo of Construction Viz, our enterprise construction management solution that can be deployed to your Microsoft 365 tenant.



Related Posts
How the New Copilot Project Manager AI Agent Benefits Construction Scheduling
Construction Document Management and the SharePoint Term Store
Murph 2025 is almost here – Take the Challenge!