• Skip to primary navigation
  • Skip to main content
  • Skip to primary sidebar
  • Skip to footer
Lydon Solutions

Lydon Solutions

Construction Project Management Software Solutions

  • Construction Viz
  • Clover AI
  • Services
    • Business Consulting
    • Professional Services
    • Microsoft 365 Managed Services
    • Government Agencies
  • Company
  • Events
  • Blog
  • Careers
  • Contact
  • Search
  • Free Consultation
Show Search
Hide Search

SharePoint for construction

Construction Document Management and the SharePoint Term Store

Microsoft Tips | May 28, 2025

Most construction organizations prefer to store electronic project files in folders. While a file folder system is familiar and easy to use, metadata can offer many benefits. This article delves into the SharePoint term store, one approach to leveraging metadata as part of your overall document control strategy.

Folders vs. metadata is always a source of discussion when implementing a construction document management solution. In a previous post, we discussed the pros and cons of metadata vs. folders. If you want to gain more reporting and searching on your files, the SharePoint term store might be an option without overturning the folder applecart.

What is the SharePoint Term Store?

Metadata is information about information. The SharePoint term store is a directory for creating and managing metadata in SharePoint.

So, instead of building custom SharePoint columns or enabling site columns to store metadata in each document library, the term store allows you to add a managed metadata column that points to the centrally managed term store.

Build the SharePoint term store once and add it in multiple places.

How Do I Use the SharePoint Term Store?

Once you create a term in the term store, you can add it as a managed metadata column to SharePoint lists and libraries, Teams files, and even Power Apps.

After you add the managed metadata column, a user can “tag” files with terms instead of just adding them to a folder when uploading.

Doc-Mgmt_1
Doc-Mgmt_2

Where Do I Create and Administer Terms?

As a SharePoint administrator, you can navigate to the term store from the SharePoint admin center under Content Services. The term store is organized in a hierarchical structure.

A good example of a hierarchical set of terms would be the CSI MasterFormat. The Term Store is organized as follows:

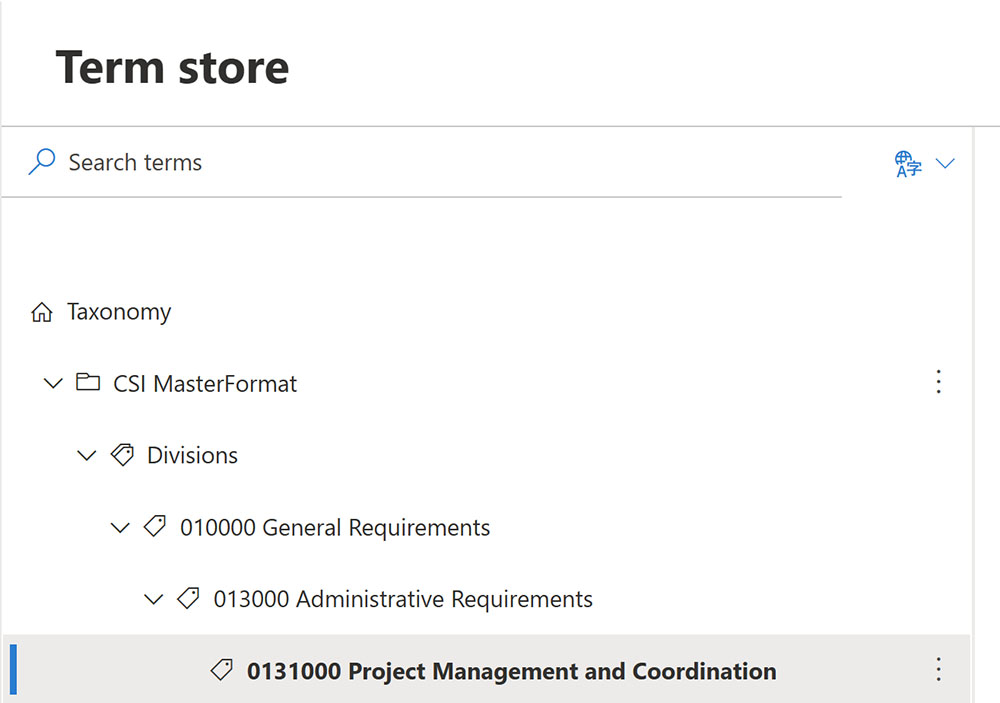
  • Term Groups - Term groups are related terms identified with a folder icon. Ex. CSI MasterFormat
  • Term Sets - Term sets are added to Term Groups to collect related terms. Term sets display with a multiple tag icon. Ex. Divisions
  • Terms - Terms are the values within the Term Sets that the user would select when “tagging” a file. Terms display with a tag icon as well. You can add nested terms, like folders, to create a hierarchy. Ex. 010000 General Requirements, 013000 Administrative Requirements,, 0131000 Project Management and Coordination

Terms are the values within the term sets to select when “tagging” a file. Terms display with tags as well. You can add nested terms, just like folders, to create a hierarchy.

The Advantages of Adding Terms to Your Projects

Using terms with your project is beneficial for several reasons:

  • You can filter and search by terms to make finding files easier than just knowing the folder structure or file name.
  • You can assign multiple terms to each file without creating additional columns.
  • You can import terms from Excel.
  • You can still use folders with terms.
  • Managed metadata columns are available for reporting in Power BI.

Considerations:

  • Users must take the extra step of “tagging” the files unless you add a custom workflow.
  • Up-front planning is essential so that once they are out in the wild, terms are used correctly and consistently across projects.
  • A term store administrator/point of contact should be assigned to manage terms and overall change management.

There are many features in SharePoint and Microsoft 365 that can help construction organizations manage their projects. If you need help delivering the right solution for your specific needs, you can reach out for a free one-hour consultation by filling out the form below. If you are looking for an enterprise construction management solution for Microsoft 365, you can request a demo of Construction Viz here.

Get a Free Consultation

  • This field is for validation purposes and should be left unchanged.

Always Find What You Need With SharePoint Favorites

Microsoft Tips | April 16, 2025

Over the years, SharePoint has evolved into the place to do everything in Microsoft 365. But with the impressive list of features also comes complexity. For example, there are 20 options in the documents menu list, not including sub-menus. It is intuitive if you are an experienced SharePoint user, but it can be overwhelming for the non-tech-savvy field user. Fortunately, some shortcuts, like SharePoint favorites, can help you on your next construction project. Check out this article to find out more.

Favorites are a key feature often overlooked but can really help project teams find what they need.

SharePoint Site Favorites

For starters, when you create a new SharePoint site, it can sometimes be challenging trying to find it. If the site is one you frequently use, follow it so that it displays in the Following grouping on the Microsoft 365 SharePoint landing page. You can follow a site by clicking on the star at the top right of the card or clicking the following star once you navigate to the site's home page.

SP-Faves_1a

SharePoint Document Favorites

Finding documents is the #1 challenge for field workers in SharePoint. Do they use search, navigate to different sites, open folders, filter document views, or all of the above? Favorites might be a great option if they frequently use the same files.

In the document menu for a specific file, you can select Favorite, which will tag the file and add it to your Favorite menu in One Drive Online. Yeah, kinda odd place, but if field users make all of their key files into Favorites, they can access One Drive directly instead of multiple SharePoint sites. Also, the files will show in the OneDrive mobile app and the Microsoft 365 Copilot mobile app if you have them installed on your mobile device.

SP-Faves_2

SharePoint Site Pages Favorites

If your IT team is familiar with SharePoint, they will most likely have more than one site page within SharePoint sites. The purpose of site pages is to display information differently for different audiences within the same site. So, if you have access to the site pages, you can also make them Favorites. This feature is interesting because SharePoint .aspx pages will also be displayed in OneDrive Online, which could make navigation more manageable for the field user.

SP-Faves_3
SP-Faves_4

Microsoft SharePoint for Construction Project Management

Want help managing your construction projects with Microsoft 365? Lydon Solutions has in-depth experience providing solutions for the construction industry on Microsoft 365. You can reach out below for a free one-hour consultation.

If you need a turnkey construction management platform for Microsoft 365 SharePoint, you can request a demo of Construction Viz here.

Get a Free Consultation

  • This field is for validation purposes and should be left unchanged.

You Built It. Now Make Sure They Come: SharePoint Site Usage Analytics

Microsoft Tips | April 10, 2025

Microsoft 365 SharePoint data sprawl is common across construction organizations, especially if project teams are given carte blanche permission to create their own sites. Fortunately, Microsoft has provided SharePoint site analytics to gain insight into whether sites are being used. Check out this article to see how SharePoint site analytics works and how the reports might help your organization get the most out of SharePoint.

A significant pro and con of SharePoint is how straightforward and quick it is to create sites. Because of this, IT departments often grant SharePoint admin permissions to project teams to add and develop sites on their own, often without guidance. Before you know it, hundreds of sites are loose in the wild. And once the genie is out of the bottle, it is challenging for IT departments to control the ensuing data sprawl.

How to Get SharePoint Site Usage Reports

To help get the most out of SharePoint and possibly reduce the number of sites, Microsoft includes site usage reports to understand how the sites are being used. You can access the reporting from the site settings by clicking Site Usage.

sharepoint analytics 1

Note the following considerations:

  • Site admins, owners, members, and visitors can view site usage data.
  • Site visitors cannot run external user reports or download the 90-day usage report.
  • Guest users with Site Owner permissions will not have access to site analytics or site usage data.

Available SharePoint Site Usage Report Dashboards

There are many valuable dashboards available in the site usage reports that provide 7, 30, and 90-day windows of site usage data.

sharepoint analytics 2

Overall Traffic

Unique viewers
This dashboard provides the number of unique viewers of your site regardless of how often they visit it. So, if you want to see if the entire project team has at least accessed a site, this report will be beneficial.

Site visits
Site visits provide the total number of visits to pages, documents, and news. This dashboard lets you see how often users visit the site. If they haven't visited the site for over 90 days and the project is closed, it might be a good candidate for deletion or archiving.

Average time spent per user
The average time spent per user report shows the trend of actual time spent on modern SharePoint site pages and news posts by users. The report calculates when users are active on the page or news post, not counting when the page is minimized or when the user has the page open but is inactive.

This report might provide insight into whether the site is compelling enough to keep users engaged. If there are many viewers but they don't spend much time on the site, it might warrant a redesign of the site for more interactivity or rethink what type of content is provided.

Popular content in the last 7 days.

These dashboards provide insights into the number of unique viewers, visits, and time spent across Site Pages, News, and Documents.

Note the following considerations:

  • Guest and anonymous views and visits are included for sites after March 2019.
  • User activity reflected in the report will not include usage data collected in the last 60 minutes.
  • When a third-party tool is used to render PDF files from a SharePoint Online library, these views are not recorded, nor are they reflected in the file view statistics in the audit log.
  • Files such as .jpg, .gif, .jpeg, .png, and .svg are excluded from the reports.

Usage insights

Usage insights are a more granular view of usage by device and the time of the day.

By Device
This dashboard shows the percentage of time spent on desktops, mobile web, mobile apps, tablets, and other devices over 7, 30, or 90 days.

Suppose you built the site for field use, but don't see any mobile usage. That might mean that users are forced to go into the office to access the site instead of remotely in the field where the work is being done. As a result, a different mobile approach might be warranted, such as using the OneDrive mobile app, Power Apps, or the Microsoft 365 Copilot mobile app.

LS_Site-Analytics 3

By Time
The by-time report shows the hourly trend of visits to the site over the last 7 days, 30 days, and 90 days for the viewer's local time zone. Darker shades on the chart refer to time slots when there are more views of the content on the site. This chart may be helpful if you want to target the ideal day and time for news or announcements to your teams.

LS_Site-Analytics 4

Shared with External Users
This report provides a list of files you can access that have been shared outside your organization. The report is an Excel export that where you can choose where to save the file when you run the report. The report is handy if you want to monitor external sharing and analyze whether the approach to sharing is optimal, considering how the sites and libraries have been organized.

Final Thoughts

The SharePoint site usage reports are an excellent but often overlooked feature for gaining better insights into how your sites are being accessed and used. They provide a tool to support further investment in developing new site features or deleting a site to shrink the footprint and overall file storage.

If you are still brainstorming on how to structure your SharePoint sites to be the most effective for your project teams and have some questions, you can reach out for a free one-hour consultation here. We are always happy to help.

If you want a turnkey construction management solution for Microsoft 365, check out Construction Viz and request a demo here.

Keep Your Construction Data Safe with Microsoft 365 Permissions – Part 2 

Tips from the Field | November 10, 2023

In part 1 of this three-part series on Microsoft 365 permissions, we discussed Microsoft 365 admin roles and application-specific permissions. Part 2 of this series will focus on Microsoft SharePoint Online permissions management. SharePoint brings another level of permissions management to Microsoft 365 applications, which is why we are keeping this topic separate.  

Think of SharePoint as the database for Microsoft 365 applications. Microsoft Teams, Microsoft Planner, and Microsoft Lists store data in SharePoint lists and libraries. You can thus extend the default permissions from the app level through the underlying SharePoint site permissions.  

This article will discuss SharePoint permission levels and groups and how you can modify them to help manage overall project permissions. 

Structure of SharePoint Permissions

Picture1

To understand permission controls within SharePoint, you must first understand SharePoint permissions levels.  

SharePoint Permission Levels

Permission levels navigation link from the advanced permissions settings

Permission levels enable users to perform specific tasks. Permission levels are assigned to permission groups or can be assigned to a user directly (not recommended). The permission levels that we typically see on construction projects are the following:

  • Full control - Enables users to view, add, update, delete, approve, and customize items or pages on the website. This level is typically reserved for just the SharePoint admins since this level could delete entire pages and libraries. 
  • Read – Enables users to view pages, list items, and download documents. This level is suitable for managers and external stakeholders viewing but not modifying data. 
  • Contribute - Enables users to manage personal views, edit items and user information, delete versions in existing lists and document libraries, and add, remove, and update personal Web Parts. You typically assign this level to users who add and upload data. This level is most common for construction team members sharing files and forms. 

You can create and modify permission levels from the advanced permissions settings menu if you are a site owner or have full-control permission.  

Default Permission Levels 

Lydon Solutions typically adds a custom permission level to projects, and we name it “Contribute No Delete” to accommodate external contractors. This custom level allows users to upload but not delete records, which is handy when sharing files between internal and external stakeholders.  

Uncheck "delete items” in the permission level settings to create a new “Contribute No Delete” level. 

SharePoint Permission Groups

Permission groups are containers where you can assign a permission level and users. You can add a permission group to an entire SharePoint site, and its permission level would be inherited across every artifact (list, library, folder, and record) in the site. Alternatively, you can break inheritance and assign a different permission level to a group or user for individual SharePoint artifacts.  

As with any other Microsoft 365 application, there are default permission groups available: 

  • Site owners – Site Owners can manage site permissions, add and delete artifacts, edit site settings, and change site themes. This group has the Full Control permission level assigned in SharePoint.  
  • Site members – Site Members can add and delete records in lists and libraries. This group has the Contribute permission level assigned in SharePoint. 
  • Site visitors – Site visitors can see site content but not edit it. This group has the Read permission level assigned in SharePoint. 
SharePoint Default Permission Groups 

These default permission groups are automatically assigned to every artifact on the site and will be added to every new artifact you create. This means that while site visitors cannot edit content, they can still see everything in the site, which might not be ideal if you share the site with external users and have sensitive documents on your site.  

For sites with external contractors, you will want to create new named permission groups and possibly a new permission level to control project permissions. You can add new permission groups from the advanced permission settings. 

Advanced permission settings – Create a Permission Group 

Also, instead of every user having access to all of the content on the site, you will most likely want to break inheritance (permissions) for specific artifacts. To change the permissions for each artifact, go to the library settings menu, select permissions, and click Stop Inheriting Permissions. 

Library Permission settings – Stop Inheriting Permissions 

At this point, you should have a general idea of permission levels and groups. Please be aware that most projects have different permission levels and group needs, but here are a couple of examples of what you might have on a construction project for owner-project managers and external contractors: 

Owner-Project Managers: 

  • Permission group name: Owner Project Manager. 
  • Permission level: Contribute. 
  • Assigned: Site level. 
  • Scope: Project Managers can add and delete list items and documents across the entire site. 

External Contractors: 

  • Permission group name: Contractor. 
  • Permission level: Contribute No Delete. 
  • Assigned: Contractor Document Library. 
  • Scope: Access to only the Contractor Document Library to upload files but not delete anything. 

This article is just the tip of the iceberg regarding SharePoint permissions. SharePoint permissions can get pretty complex, and you might end up with a spiderweb of assigned permissions. If you need help with permissions or just setting up your projects in Microsoft 365, you can reach out for a free one-hour consultation here. 

For Part 3 of this series, we will be covering file sharing. While this is the easiest way to assign permissions at a folder or file level on a case-by-case basis, we wanted to get the concepts of permissions management in Microsoft 365 out of the way first. Stay tuned. 

Check out more blogs from Keep Your Construction Data Safe with Microsoft 365 Permissions

  • Keep Your Construction Data Safe with Microsoft 365 Permissions – Part 1
  • Keep Your Construction Data Safe with Microsoft 365 Permissions – Part 3

Tips from the Field: Adding Images to a Power BI Report

Tips from the Field | November 21, 2022

Microsoft 365 Power BI is an incredibly powerful reporting tool and is fast becoming the go-to reporting solution in construction. While creating connections to different data sources and building cool reports is relatively straightforward, adding dynamic images is not as simple.

Read on to learn how to add images to your Power BI report.

Two options when adding images to Power BI reports

There are two paths to adding images to a report.

Option 1

Your first option is to insert images directly into the report. This approach is useful if you want to embed a static image into your report, like adding a logo to a project-specific report.

Unfortunately, you need to open Power BI, update the report, and re-publish it to add or edit images.

Note: These embedded images will display when you print a report.

Option 2

Your second option is to link images dynamically from another file location. This approach allows you to connect to images from another file location and display them dynamically in your report.

A good example of this would be a set of project progress photos that are dropped off in a SharePoint image library every month. You could then connect these photos to your report and use a project and time period slicer to display only the images you would like to see in the report.

While this approach provides the most flexibility, since images are read from the image library, the setup in Power BI of the connection is more difficult.

Also, there are a few considerations to be aware of:

  • Viewers must have permission for both the image library and the Power BI report to view the images.
  • Images will not display in Power BI Desktop until you publish the report to Power BI Online.
  • The connected images will not display when you print a report.
Power BI Desktop with both options
  • When images initially display in Power BI, they will appear as small thumbnails, and you will not have many options to format them. You will most likely need to “Get more visuals” and find a third-party image display visual. See the screenshots below for how to do this.

Step 1: Click the three dots and select “Get more visuals” 

<b>Step 1:</b> Click the three dots and select “Get more visuals”

Step 2: And then search on images and click on one to add 

<b>Step 2:</b> And then search on images and click on one to add

So, you might wonder how actually to create a dynamic image connection in your report from SharePoint? There are a bunch of steps to doing this, but I found a great video to get you most of the way there: A little trick for SharePoint Online Images in Power BI.

We hope this blog helps you build out your project status report. If you need a complete reporting solution from building a Power App to collect period data or structuring a Power BI Report that can filter by project and period, you can submit a consultation request here.

Tips from the Field: List and Document Library Templates

Tips from the Field | February 25, 2020

Have you ever wanted to create a standard document library in SharePoint with key columns for the project name, contractor, document types, and owner that you can reuse multiple times or import into another site? You can with SharePoint List and Document Library Templates.

Benefits of List and Document Library Templates in SharePoint

SharePoint’s List and Document Library Templates is a powerful feature that will help speed up site creation. There are many benefits to creating sets of list and library templates that you plan to reuse:

  • Standardize lists and document libraries settings (versions, check in check out, and so on)
  • Standardize lists and document library views.
  • Standardize metadata columns and content types across your content.
  • Include content in the template, such as previously created records, which could be helpful if you are creating an archive, backup, or phase of a project.
  • Reduce errors in rebuilding sites.
  • Accelerate time to build sites with repeatable tasks.
  • Export your list and library templates to other sites.

How to Create a List or Library Template in SharePoint

Creating a list or library template is relatively easy.  Make sure you define a template nomenclature in advance so you can easily determine the latest one to use when replicating. Then follow the steps below.

  1. Once you have created a list or library in SharePoint, go into Settings and click the “Save list as a template” link under the Permissions and Management column.

creating standard document library in SharePoint

2. Fill in the File Name (used when you export), Template Name (what will show in your Site Contents Apps), and a Template Description (a handy way to describe how you will use the template).   Note: make sure to use nomenclature that is consistent and easy to identify.

3. If you want to include the records that are currently in the list or library you created, click “Include Content.”

4. SharePoint will display a confirmation message if the creation step was successful.

5. Once created, your template is now available when you add an app under Site Contents.   You can now use it just like any other app.

Want to do more with Microsoft SharePoint and Office 365?

The Lydon Solutions team knows construction and IT.  Our team can help you keep ahead of your competition by getting the most out of technology solutions like SharePoint and Office 365. Contact us for a free consultation.

And if you need something turnkey, we also offer Construction Viz, a powerful construction project management solution with everything required to manage your construction projects, including document management, dashboards, reports, forms, workflows, and more. Construction Viz is available in the cloud, on-premise, or as à la carte apps deployable in Microsoft Office 365 and SharePoint.

  • Page 1
  • Page 2
  • Page 3
  • Go to Next Page »

Primary Sidebar

Recent Posts

Microsoft Tips | May 28, 2025

Construction Document Management and the SharePoint Term Store

Company News | May 22, 2025

Murph 2025 is almost here – Take the Challenge!

Microsoft Tips | May 1, 2025

Use Microsoft 365 Groups for a Project Email Inbox

AI Solutions | April 24, 2025

Copilot and Planner Premium – R.I.P. Project Schedulers?

SharePoint Favorites
Microsoft Tips | April 16, 2025

Always Find What You Need With SharePoint Favorites

sharepoint site usage analytics
Microsoft Tips | April 10, 2025

You Built It. Now Make Sure They Come: SharePoint Site Usage Analytics

Footer

About

Lydon Solutions is a WBE consulting group specializing in construction project management software solutions using Microsoft SharePoint. Learn more >

Products & Services

  • Construction Viz
  • Clover AI
  • Professional Services
  • Business Consulting
  • Microsoft 365 Managed Services
  • Government Agencies

News & Events

  • Events
  • Blog

Company

  • About
  • Careers
  • Contact Us

Join our Mailing List

  • This field is for validation purposes and should be left unchanged.
Lydon Solutions

© Lydon Solutions

  • Sitemap
  • Privacy
  • Cookies
  • Terms of Use
  • Disclaimer

Click here to start a Microsoft Teams chat.

Contact Us
Name(Required)
This field is for validation purposes and should be left unchanged.