In part 1 of this three-part series on Microsoft 365 permissions, we discussed Microsoft 365 admin roles and application-specific permissions. In part 2, we covered Microsoft SharePoint permissions. In the final part of this series, we will focus on file-sharing permissions in Microsoft 365.
With Microsoft OneDrive and SharePoint applications, you can share individual files and folders directly with internal and external team members. The process is much more straightforward than the permissions management process in SharePoint, as discussed in part 2 of this series. Still, it is easy to overlook the underlying sharing features because of its perceived simplicity. Without understanding the extent and interdependences of sharing, determining who has what permissions and what level of permissions users have across all assets in your libraries, folders, and sites can be challenging.
Recently, Microsoft has unified the sharing menu across Microsoft 365 applications, so the sharing user interface is consistent, making it easier for users.
The New File-Sharing Feature in Microsoft 365
The new Microsoft 365 sharing menu packs a lot of functionality!
Once you select a folder or file, you can click on share to bring up a modal window with the option to choose with whom you want to share the file. There is also an area to provide a message if you intend to email a link to the record. You can also copy and send the link manually via email or chat or paste it into a document.

A few features worth highlighting in the new share menu:
1. Sharing settings – If you click on the cog in the top right of the share menu, you will access the sharing. Depending on your SharePoint administrator’s permission management controls, you can select categories of people you can share the file with and the permission level you want to be associated with the file. You can even block the file from being downloaded.

2. Permission Levels - If you click the down arrow next to the “add a name, group, or email” field where you input who you want to share a file with, you will get the permission levels you can assign to the file.

You will better understand permission levels if you refer to part 2 of this series of permission management articles. With regards to SharePoint, these levels correlate to:
-
- Can edit - Contribute access.
- Can view – Read access
- Can review – This is new to those familiar with SharePoint permission levels. “Can review” allows you to add comments to a document, but you do not have edit control.
3. Manage Access – If you click on the avatars (people icons) in the bottom left, you will access the Manage Access settings.
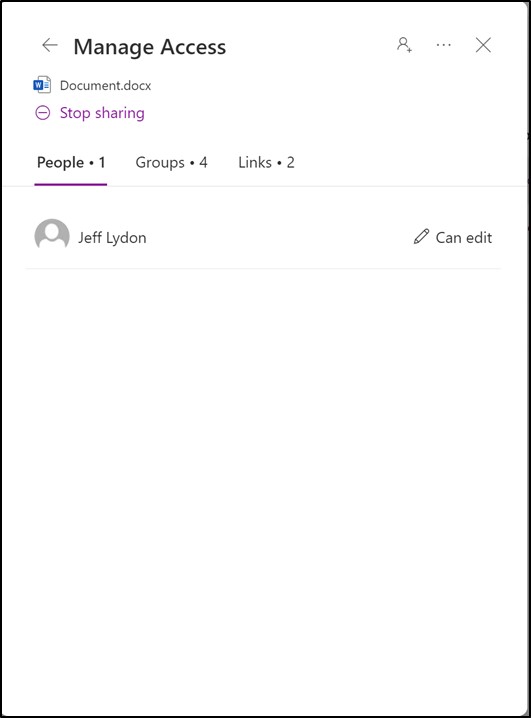
- You can grant access/permission to the file from here if you click on the plus avatar in the top right of the screen.
- Under the People tab, you change a person’s access/permission level.
- The Groups tab displays the number and list of permission groups assigned. Links will display a link aligning with the access/permission levels given so you can easily copy the links.
There’s a lot of functionality in this small modal window, but make sure to investigate to know exactly who can do what with your files.
You might wonder how this aligns with SharePoint since it has its own permission management structure. From Part 2 of this series, we referred to breaking inheritance when you assign unique permissions on each asset (list or library) in SharePoint. When you share a document directly using the share menu, it breaks the inheritance behind the scenes in SharePoint. That’s an essential action in SharePoint that you need to be aware of because of the following:
- If you add any new assets to the site, they will not automatically inherit the site permissions. You will have to add them manually.
- It is not readily apparent that you are sharing your file at a glance. In SharePoint, you can see who can access the documents by editing the document library view and including the “shared with” column.
Sharing files in Microsoft 365 is relatively easy, but many considerations are needed to maintain the security of your data. We recommend using permission groups as much as possible and avoid assigning permissions to specific users. Also, it is a best practice to create a permissions matrix for each project that details permission groups, levels, members of each group, and the assets to which each group has access.
If you find permissions management complicated and need help getting things up and running or need help with Microsoft 365, you can reach out for a free one-hour consultation here.
