• Skip to primary navigation
  • Skip to main content
  • Skip to primary sidebar
  • Skip to footer
Lydon Solutions

Lydon Solutions

Construction Project Management Software Solutions

  • Construction Viz
  • Clover AI
  • Services
    • Business Consulting
    • Professional Services
    • Microsoft 365 Managed Services
    • Government Agencies
  • Company
  • Events
  • Blog
  • Careers
  • Contact
  • Search
  • Free Consultation
Show Search
Hide Search

Tips from the Field

Don't miss out. Receive blog updates on the latest Lydon Solutions company news, product updates, and much more by joining our mailing list today.

  • This field is for validation purposes and should be left unchanged.


Use the Choice Field in SharePoint to Ensure Consistent Input from Users

Tips from the Field | June 27, 2018

Do you need users to enter critical project information in a consistent way? If so, consider using SharePoint’s choice column type to prompt users for relevant information.

Sometimes you need to ensure that your project data conforms to a certain format for reporting or compliance. This is where choice fields in SharePoint are helpful. Choice fields can be configured to require users to pick from a preset list of values in a list or library.

Before using a choice field, however, consider your list’s size and use since there may be better options.  For example, if the list is large (e.g., a submittal form), consider using a separate SharePoint list app to store the values and then use a lookup to retrieve them. On the other hand, if the list is relatively short (e.g., a status field) and the field used in multiple lists and libraries, consider a site column. (We will discuss site columns in a future tip.)

Also, keep in mind that choice fields are not available as data sources in lookup columns. So you cannot create another list or library and have a column lookup and return values from a choice field.

If you decide that the standard choice field is the best option, here are the steps to set it up.

Setting Up a Choice Field in SharePoint

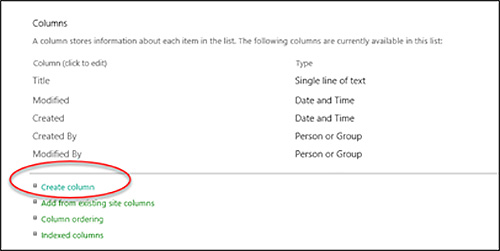
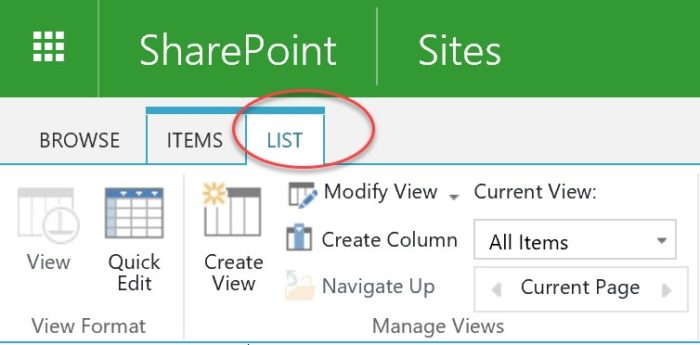
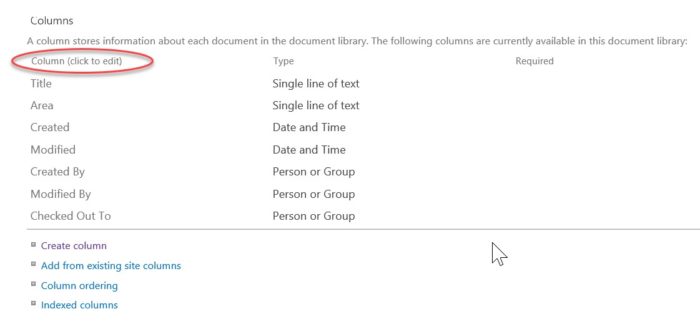
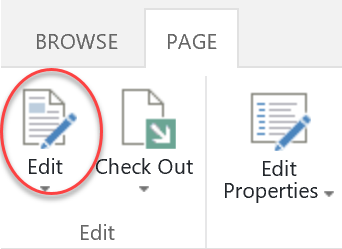
First, select “Create Column” within a list or library.

Then follow these steps, which correspond to the numbered sections on this screen shot:

1. Name the column, e.g., “Cables.”
2. Select “Choice Field.”
3. In the “Description” field, enter what you want users to see on the form when they update the record (e.g., “underground cabling”).
4. Select “yes” for the “Require that this column contains information” option if you want this field to be filled in as a condition of saving a record. This avoids blank data fields.
5. Choose “yes” for the “Enforce unique values” option if you want to stop a user from entering the same value in the fields for different items.
6. The box under “Type each choice on a separate line” is where you specify each value you want to display in the choice field (e.g., “copper” and “steel”). Enter each value on separate lines in the text box. Note that your entries can only have one space between characters – SharePoint will ignore any added spaces when displaying your values.

It is sometimes helpful to make “Choose a Value” the default choice (see step #9). This prompts the user to select a relevant value.

7. Choose from the following display options based on your needs:

  • Drop-Down Menu – This is the default functionality with a single pick from a drop-down list of values.
  • Radio Buttons – Buttons for each value are displayed under the choice field on the edit form. Only one selection can be made from the list of choices.
  • Checkboxes – This option allows the user to select multiple values in a checkbox-like format.  Once the values are selected, they are added to the data field, separated by commas.

8. Selecting “yes” for the “Allow Fill-in choices” option allows users to type whatever they want into the choice field. This can come in handy if you are not sure of all the choices your users might want to make. However, the user-entered value does not update the choice field options, so future users will not see the new fill-in option. Fill-in choices will show in a View filter, so you can retrieve them for reports or queries.

Note: In Quick Edit mode, SharePoint will store values entered into fields with the “Allow Fill-in” option enabled. This isn’t obvious when you switch to Quick Edit View, which can be confusing for users.

9. The “Default Value” allows you to define a default value for the field. Just remember that, even if you make the choice field required, having a default value will allow your users to proceed without having to make a selection.

Get more tips and tricks for construction project management professionals

We hope you found this information helpful. We encourage you to check out our other Tips from the Field blog series, which features valuable information for construction project managers.

Newsletter (Blog)

Insert blog description here.

  • This site is protected by reCAPTCHA and the Google Privacy Policy and Terms of Service apply.
  • This field is for validation purposes and should be left unchanged.

What’s the difference between a single-line vs. multi-line text column in SharePoint?

Tips from the Field | February 28, 2018

Learn the key differences between single-line and multi-line text columns in SharePoint – and how to select the right column type for your needs.

There are two types of text columns – single-line or multi-line – that you can add to a SharePoint list or library. It may seem like the difference is obvious. However, the behavior of these two column types in SharePoint is drastically different.

Refer to the table below for a comparison.

Single-line vs. Multi-line Text Column in SharePoint

Single-line Text Column Multi-line Text Column
Maximum Length 255 characters • List = 63,999 characters
• Document library = Unlimited (optional)
Filter and sort in a view Yes No
Reference in a lookup column Yes No
Use in a calculated field column Yes No
Change column type (e.g. choice, number, currency, date and time, single-,or multi-line text.) Yes No
Enforce unique values Yes No
Define default value Yes No
Add rich text (e.g. bold, italics, text alignment, or hyperlinks) No Yes
Enter enhanced text (e.g. pictures, tables, or hyperlinks) No Yes

Which is better: single-line or multi-line text columns in SharePoint?

As you can see, there are significant differences between the two text column types in SharePoint. For example, once you add a multi-line text column, you cannot switch back to a single-line text column. You must instead create a new column.

So which text column in SharePoint is better? We recommend using a single-line text column over a multi-line text column whenever possible. Single-line text fields are the most flexible – so you can do things like later change the information type to add a lookup column, build calculated fields and so on.

Sometimes, however, multi-line text columns are necessary. One example would be a contractor response field in a Submittal Form. Be aware that getting that data back out (e.g. for use in reports, calculations, workflows, etc.) is challenging without custom coding.

Read more about list and library column types and options in SharePoint.

Get more tips and tricks for construction project management professionals

Our Tips from the Field blog series features handy information for construction project managers. Subscribe to our newsletter to get our latest tips and tricks delivered directly your inbox each month.

And be sure to check out our previous tip to learn how to configure required fields in SharePoint.

How to Configure Required Fields in SharePoint

Tips from the Field | April 21, 2017

Here’s how you can make any field a required field in SharePoint – or change a field to not be required.

Need to ensure that users enter certain information when saving records to SharePoint? SharePoint lets you designate required fields. Doing so specifies that the required field must be populated with data before a record can be saved and made visible to other users.

This option is handy for Document Control since it requires that users populate key data, for organizing and reporting, when saving a record –which as we know, can sometimes be a challenge.

Continue reading to learn how to designate any field as required in SharePoint (or vice versa).

Default Required Fields in SharePoint

SharePoint has different required field defaults depending on the application that admins and document control specialists should be aware of:

  • List – Title field is required
  • Contacts – Last Name field is required
  • Tasks – No required fields
  • Picture Library – No required fields
  • Calendar – No required fields
  • Document Library – No required fields, but the Name field automatically captures the filename when a document is saved. Users can populate the Title field whenever they want.

Any of these defaults can be changed by following the steps below:

How to Make a Field Required (or Not Required) in SharePoint

1.       Navigate to the Library where you would like to make the change.

2.       Click on the gear icon in the top right of the ribbon and select Library Settings. Or if you’re in a list, select List Settings.


3.       Scroll down to the Columns section of the Library Settings.

4.       Click on a Column that you would like to make required.

5.       Scroll down to the Additional Column Settings and to select “Yes” to make the field required or “No” to make it optional.

6.       Select OK to save your changes.

A few things to keep in mind:

  • Overuse of required fields can be a deterrent for some project team members, especially if the information being requested is not available/known at the time the record is saved.  Make sure to selectively choose which fields really need to be required and make sure this is part of your governance plan.
  • Utilizing the drag-and-drop feature in a Document Library with required fields can create issues.  Drag-and-drop is a great feature for users that want to upload multiple files at one time.  The downside of having required fields set for a Document Library is that the documents will be checked out to the user dropping off the files and not available for other users. The required fields must be populated and the documents checked in before other users can see and use them.  Note: This happens even if the Document Library doesn’t have document check-out turned on.
  • Quick Edit will not save until required fields are populated.
  • Choice fields with only one value or a default value will automatically save.

Want more tips and tricks for construction project management professionals?

Our Tips from the Field series features handy information for construction project managers. Subscribe to our newsletter to get our latest tips and tricks delivered directly your inbox each month.

And be sure to check out our previous tip to learn how to connect a SharePoint Calendar with Outlook.

Connect A SharePoint Calendar with Outlook

Tips from the Field | December 7, 2016

Here’s how you can create a project calendar in SharePoint, connect it with Outlook and share it with your team to keep everyone in sync.

The SharePoint Calendar App can be added to any SharePoint site. It behaves much the same as an Outlook Calendar and can be customized as needed.

A handy feature of a SharePoint calendar is the ability to connect it to Outlook. This functionality allows a user to add the SharePoint Calendar to their personal Outlook Calendar view. Events can then be updated bi-directionally from Outlook to SharePoint and vice versa. This is a great way to easily get your entire project team working off the same schedule.

Follow the steps below to get your SharePoint Calendar connected to Outlook.

Step One – Connect Your SharePoint Calendar App to Outlook

1.       Navigate to a SharePoint Calendar.

2.       Click the Calendar tab in the Ribbon.

3.       Click the Connect to Outlook button in the Ribbon.

4.       A browser dialogue box will appear. Allow the website to open a program on your computer.

5.      Select “Yes” when prompted to Connect this SharePoint Calendar to Outlook

6.     If your SharePoint is externally hosted, you may be asked to log in.

Step Two – Open Your SharePoint Calendar in Outlook

7.     Go to Outlook and navigate to your calendar view.

8.    Under My Calendars in Outlook you will see the new SharePoint Calendar.  Check the box next to it to add it to your calendar view.

That’s it. You can now view and update your SharePoint calendar in Outlook. Any changes made to the calendar on SharePoint or by other team members in Outlook will be shared with everyone.

There are a ton of other useful ways to extend the SharePoint Calendar, including adding interactive popup windows, linking it to forms or workflows, or creating responsive mobile calendars. Contact us for a free consultation to see what is possible.

Want more tips and tricks for construction project management professionals?

Our new Tips from the Field series features handy information for construction project managers. Subscribe to our newsletter to get our latest tips and tricks delivered directly your inbox each month.

And be sure to check out our previous tip to learn how to add a text box to a SharePoint page.

How to add a text box to a SharePoint page

Tips from the Field | August 9, 2016

Here’s how you can use the Content Editor web part to include a text message on your project web pages in SharePoint.

If you’ve ever created a new project web page in SharePoint, you probably wanted to include some kind of text box for your team. This is a great way to present useful information like project scope, contact or support details, or even a training message to help team members use the site

The first idea that may come to your mind is to simply type directly into a SharePoint zone on a page directly like this:

There is nothing wrong with the above. But you can get more flexible results using the Content Editor web part.

The Content Editor web part offers the following advantages:

·       Flexibility – You can move the web part to any zone on a page without having to copy and paste your text. Plus, you won’t get broken URLs if you include them in the Content Editor web part.

·       One-click visibility control – You can hide the text contained in the Content Editor web part with a click. This can come in handy if you want to show a reminder message on certain days only – or if you want to prepare but not publish the content right away.

·       Audience targeting – You are able to target the Content Editor web part by permission group. So messages can be displayed only to specific project teams based on permissions.

·       Consistency –  You can keep all your pages looking consistent by using standard web part titles.

How to add a Content Editor web part in SharePoint

You can add the Content Editor web part to your SharePoint page in a few clicks:

Add the Content Editor web part

1.       Click Edit from the Page ribbon.

2.       Click on the zone where you would like to add the text.

3.       Click on Insert. Then click on the Web Part icon in the ribbon.

4.        Under Categories, select Media and Content. Then select Content Editor under Parts (don’t see Content Editor? Get instructions to enable it below). Click Add.

You should now see the Content Editor web part in the zone you selected.

Edit the Content Editor web part

1.       To edit the Content Editor, click on the upside down triangle on the right and select Edit Web Part.

2.        Enter your text into the Content Editor web part.

3.       You can customize the Content Editor under Appearance, including changing the title and specifying the height and width of the web part.

4.       If you want to remove the title of the web part entirely, click Appearance and change the Chrome Type to None.

5.       When you are done, click OK in the Content Editor web part and save the page

There you have it.  You built your own flexible web part for text entry that can be placed anywhere on the site page.

Content Editor web part is missing from your SharePoint?

Don’t see the Content Editor web part as an option in your ribbon? Microsoft released an update last year that disables certain web parts by default in Office 365 and SharePoint online. To restore the Content Editor web part, you or your SharePoint admin will need to turn the scripting capabilities back on for your site.

You can find instruction to do so here. After you enable scripting and refresh your site, you can continue where you left off above.

Want more tips and tricks for construction project management professionals?

Our new ‘Tips from the Field’ series features time-saving information for construction project managers. Subscribe to our newsletter to get our latest tips and tricks delivered directly your inbox each month.

And be sure to check out our previous tip to learn how to import data from Excel into SharePoint.

How to Import Data from Excel into SharePoint

Tips from the Field | May 20, 2016

There are a few ways to import data from Excel into SharePoint – learn when to use each method based on your needs.

We previously shared how to export data from SharePoint into Excel. But what if you need to import data from Excel into SharePoint? Importing your Excel data into SharePoint enables a ton of extra functionality.

Here’s a common example:

Maybe a project manager on your team created a huge spreadsheet to track data on a project such as permits or materials. Over time the spreadsheet has gotten out of control. Keeping information up to date and sharing it with stakeholders is a pain.  So you’d like to add some additional functionality like workflows based on field changes. You also want to share it somewhere and set permissions for who can access and edit data.

Putting this spreadsheet into SharePoint would allow you to do all of the above and more.

So what is the best way to import data from Excel into SharePoint?  That answer depends on the contents and complexity of your Excel data. Below are two common methods – and one bonus method.

Method One: Use the Import Spreadsheet App in SharePoint

The Import Spreadsheet App is a useful tool for basic spreadsheets. The tool creates the list with column titles in SharePoint for you and automatically imports your data.

But be careful. The Import Spreadsheet App works best when your data is a simple list with single text field data. It can get easily hung up when trying to import a list that mixes multiple data types across columns and even in a given column. Why? Because by using this app, you are letting SharePoint make the call as to how to handle the column data types.  This can lead to unexpected results.

For example, the Import Spreadsheet App often stumbles on single-line text types in date type columns or vice versa.  So if one of your spreadsheet columns includes dates and times, the tool will make that entire column a date/time data type when importing it to SharePoint. But if some of the fields in that column have text entries (e.g. “NA” or “TBD”), you will start getting errors when editing and viewing the list. And then you have the tedious chore of troubleshooting that list in SharePoint.

Don’t get me wrong, the tool can be a useful timesaver for simple spreadsheets. However, if your spreadsheet is more complex, you might spend more time fixing errors after the import.

Method Two: Create a Custom List

A better approach to import data from Excel into SharePoint – especially complex data and spreadsheets – is to use the Custom List App. This allows you to create the list the way you want it. This process takes a little more effort upfront, but saves you headaches later.

Here’s how it works:

Step 1 –First, you will need to go to Site Contents and Add an App to enable the Custom List App.

Step 2 – Select the Custom List App.

Step 3 – Define the Columns Title and Types to represent your spreadsheet in your Custom List.

Step 4 – Create a view that matches the columns in the order of your spreadsheet.  You can create a Datasheet View or Standard View and switch to Datasheet or Quick Edit.

IMPORANT: Make sure to include all the columns in your view that are required or the import will not work!

Step 5 – Highlight the data from your Excel file and copy it (Control-C). Then paste (Control-V) the data in an open row in the Edit View of the List.

Step 6 – Make sure all of the items paste without errors. Any errors will show as red circles to the left of the row. When done, click “Stop editing this list.”

Presto, the above steps are a copy-and-paste method to import data from Excel into SharePoint.

Method 3 – Set up an automated process to import data from Excel into SharePoint 

Here’s a bonus method for you. Did you know it’s possible to have a list update automatically from Excel into SharePoint? There are many options to automate importing Excel data into SharePoint.

Get a free consultation to learn more.

Want more tips and tricks for construction project management professionals?

Our new Tips from the Field series features handy information for construction project managers. Subscribe to our newsletter to get our latest tips and tricks delivered directly your inbox each month.

And be sure to check out last month’s installment to learn how to easily reorganize your files in SharePoint.

  • « Go to Previous Page
  • Page 1
  • Page 2
  • Page 3
  • Page 4
  • Go to Next Page »

Primary Sidebar

Recent Posts

Company News | January 31, 2025

Get in Shape in 2025 with the Murph Challenge

Microsoft Tips | November 21, 2024

Say Goodbye to Post-It Notes with the New Microsoft Sticky Notes App

Microsoft News | October 23, 2024

What is Microsoft Viva, and Does Your Construction Organization Need It?

Construction Viz News | October 14, 2024

8 Reasons Why Construction Viz is the Ultimate Construction Management Solution for Microsoft 365

Reviews | September 25, 2024

Is Your PC Acting up? Check Out PC Manager

Reviews | September 20, 2024

Is Microsoft Teams Premium worth it?

Footer

About

Lydon Solutions is a WBE consulting group specializing in construction project management software solutions using Microsoft SharePoint. Learn more >

Products & Services

  • Construction Viz
  • Clover AI
  • Professional Services
  • Business Consulting
  • Microsoft 365 Managed Services
  • Government Agencies

News & Events

  • Events
  • Blog

Company

  • About
  • Careers
  • Contact Us

Join our Mailing List

  • This field is for validation purposes and should be left unchanged.
Lydon Solutions

© Lydon Solutions

  • Sitemap
  • Privacy
  • Cookies
  • Terms of Use
  • Disclaimer

Click here to start a Microsoft Teams chat.

Contact Us
Name(Required)
This field is for validation purposes and should be left unchanged.